
With Octavo, schools can organise their students into classrooms and assign oBooks to each group in a few simple steps. This guide will show you how to invite users to join your school (PART 1), how to assign packs to users (PART 2) and how to create classrooms (PART 3).
For instructions on how students can join their school organisation on Octavo, please click here.
Follow the steps below to get started!
Part 1: Adding Users to Your School
- Go to www.octavo.app
- Click ‘Profile’ on the left side menu of your screen.
- Sign in to your account through the Single Sign On feature using your school e-mail account. NB: Church schools and private schools use the ‘Sign in with Microsoft’ option, while government schools may choose ‘Sign in with iLearn’.
- Once you have logged in, go to ‘Organisations’ on the left side of your screen.
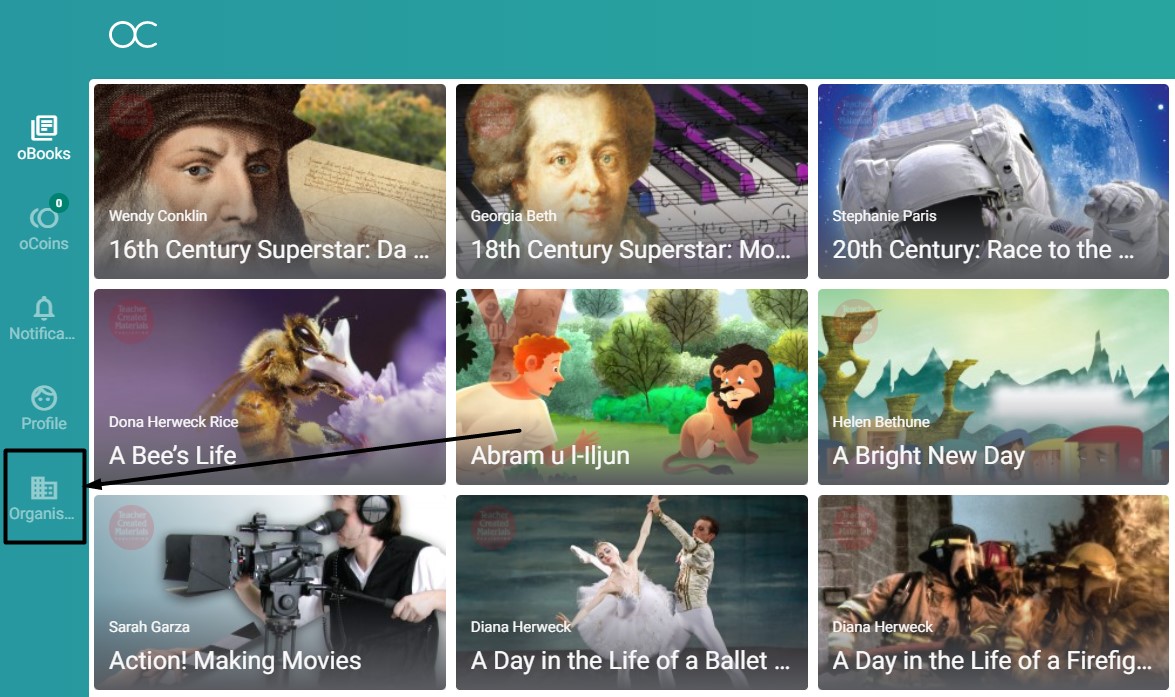
- Select your organisation and go to the ‘Users’ tab.
- Invite users to your organisation by clicking on the symbol shown in the image below.

- You will then see the screen below appear. Input the e-mail addresses of the users you wish to add to the organisation and press enter.
- Once you have added all the e-mail addresses, click ‘add’.

- Owners and administrators can assign different roles to each user by clicking on the ‘⋮’ symbol next to the user’s name and selecting ‘Edit roles’. Users with the role of ‘teacher’ will be able to assign packs to students later on.

- The users who have not yet accepted to join the organisation will appear under the ‘Invitations’ column shown above.
Part 2: Assigning Packs to your Students
💡 Teachers and administrators can assign packs to students even if they have not yet joined the organisation. This can be done simultaneously when adding students to the organisation, by copying and pasting the list of e-mails into the ‘waiting list’ section under the ‘licenses’ tab. Once students accept the invitation to join the organisation, the packs will be automatically assigned to them.
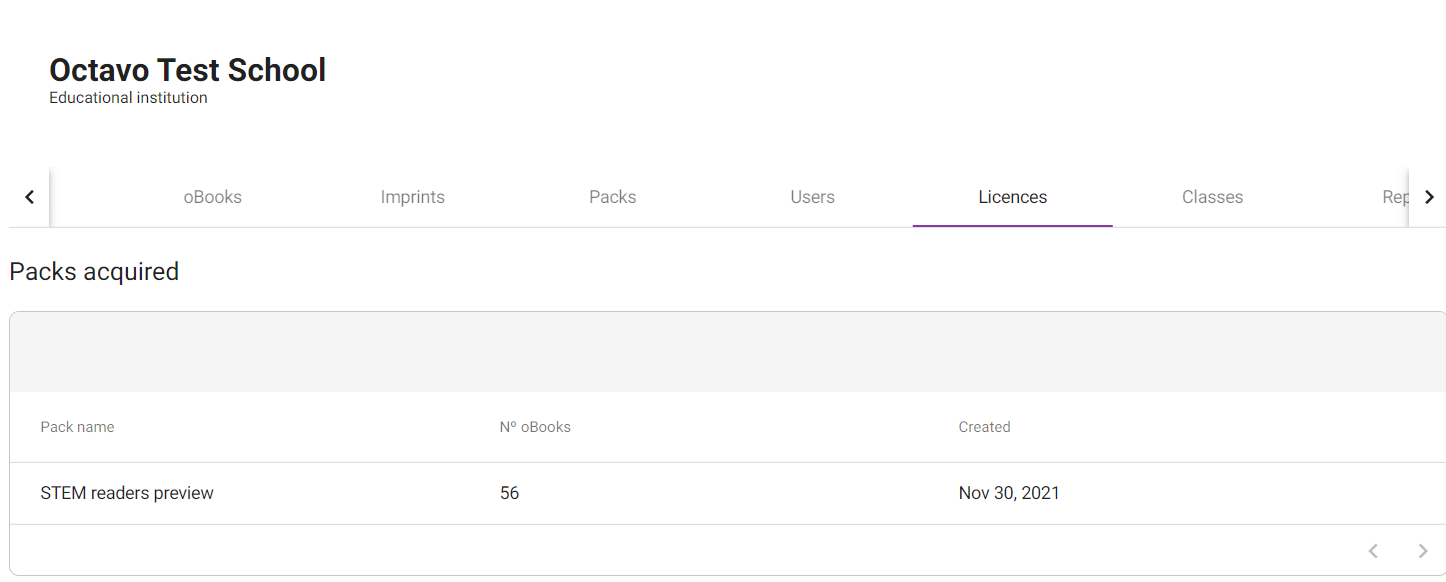
- Go to the ‘Licenses’ tab and you will see the packs that your school has acquired. Select the one you want to assign to your students.
- To add users who have already joined your organisation click on the ‘+’ symbol and select the names of students you wish to receive the pack.
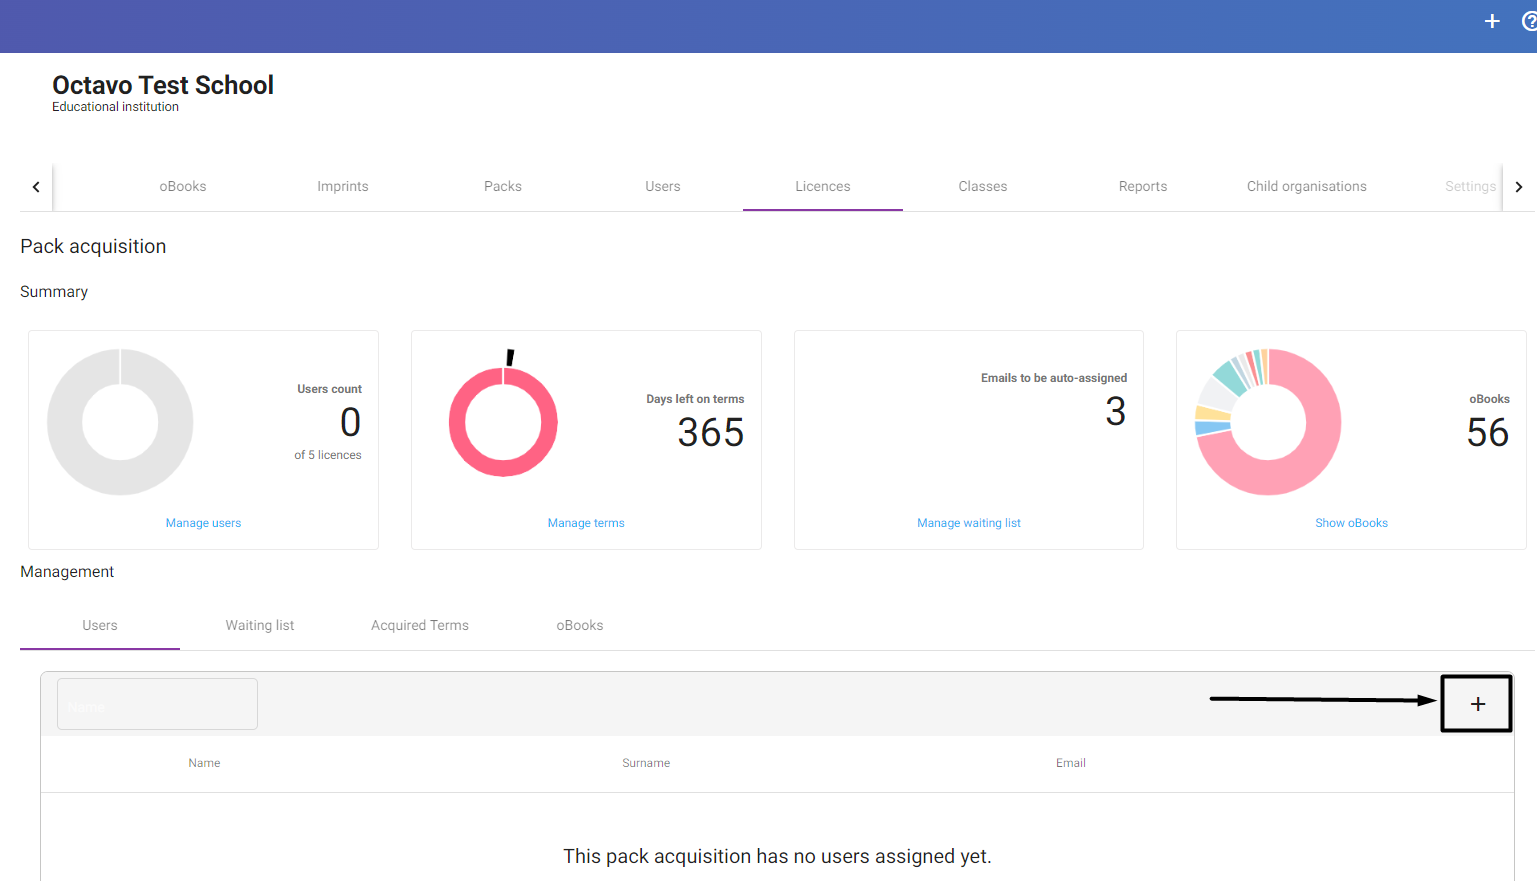
- To assign the pack to users who have been invited to join your organisation but have not yet accepted, click on the ‘waiting list’ section.
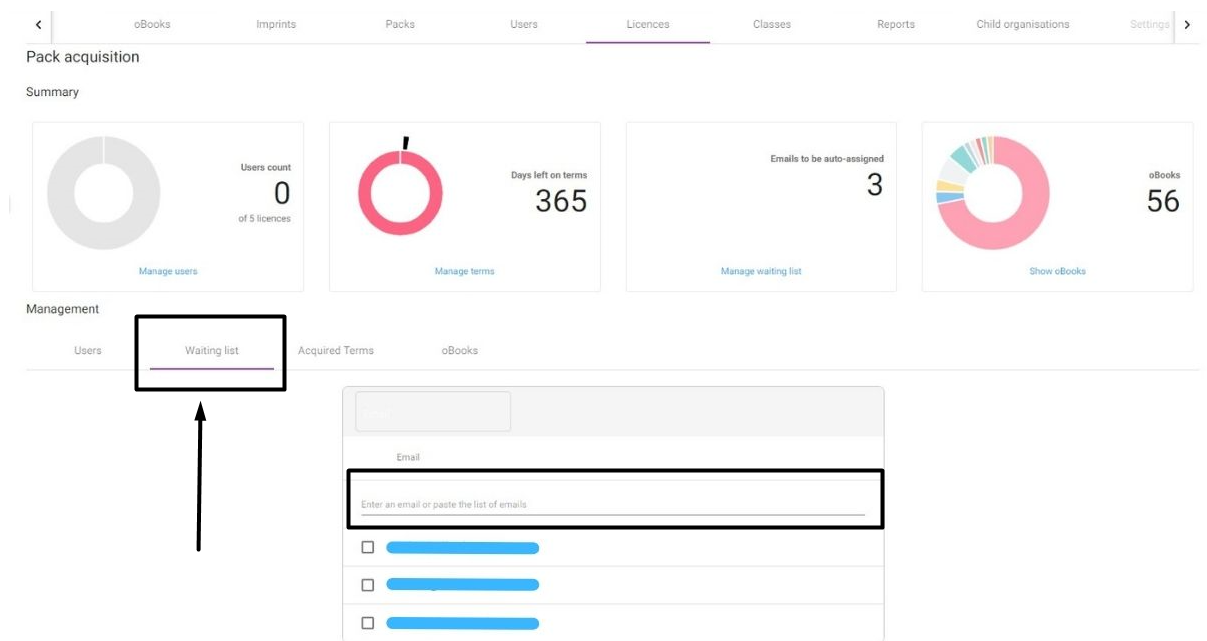
- Here, you can copy and paste the list of student e-mail addresses from your school or class. Once they join the organisation, the packs will appear in their library automatically.
PART 3: Creating Classrooms on Octavo
- Click on the ‘Classes’ tab.

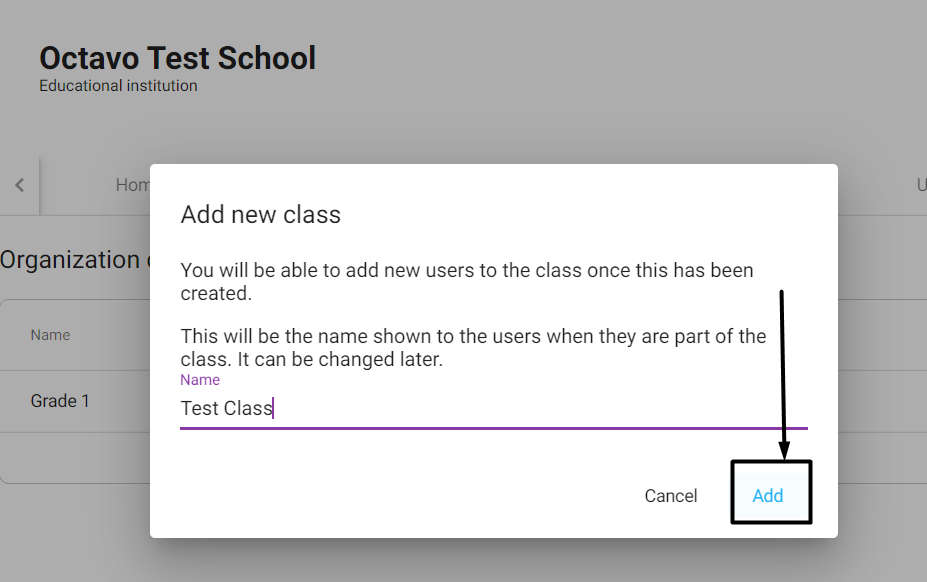
- Select the ‘+’ symbol to create a new class.

- Choose a name for your class and click ‘add’.
- Add students to your classroom by clicking on the ‘+’ symbol.

- Select the students and teachers you wish to add to the class by clicking on the ‘tick box’ next to each name. You may also search for users through the search bar where ‘name’ is written. After selecting all the students, click ‘add’.

We hope this guide has helped you organise your school and classrooms on Octavo! If you have any further questions, please contact us on support@octavo.app.
2 Replies to “How to Use Octavo for Schools”